

Drifter Merch’s blog features news, events, tour dates and vendor spotlights to music and album reviews.
Custom Gear That Crushes: What to Look for in a Custom Merch Partner
Let's be real, your merch says a lot about you. Whether you're a touring band, a business owners, or a brand trying to make waves, the gear you put out there represents your identity. It's not just fabric and ink. It's a walking billboard, a conversation starter, and for your fans, a wearable piece of the culture they love.
So when it comes to creating custom merchandise, who you partner with matters. A lot. The right merch partner can elevate your vision, deliver quality that makes people proud to rock your designs, and actually make the whole process enjoyable. The wrong one? Well, that's a recipe for faded prints, missed deadlines, and a whole lot of stress.
If you're searching for a custom merch partner who truly gets it, below is what you should look for in a collaborator.
Quality and Consistency: The Foundation of Everything
This one seems obvious, but you'd be surprised how often it gets overlooked. Quality isn't just about using decent materials. It's about maintaining that standard across every single order, whether you're printing 50 tees for a local store or 5,000 pieces for a summer tour.
Your fans are investing in your merch because they believe in what you're creating. Nothing kills that vibe faster than a shirt that cracks after one wash or colors that fade before the tour even ends. A great custom merch partner uses quality blanks from trusted brands and employs printing techniques that are built to last.
Consistency is the other half of this equation. If someone buys your company’s logo shirt at one event and their friend grabs the same design three months later, those shirts should look and feel identical. Your partner should have quality control processes in place to ensure every piece that goes out the door meets the same standard. No surprises, no excuses.
Design Expertise: More Than Just Technical Know-How
Here's where things get interesting. Sure, any print shop can slap ink on a shirt. But do they have years of experience and can they actually understand your needs? Can they take your rough concept and help refine it into something that pops? Can they advise you on color choices, placement, and sizing that'll work best for your specific audience?
A great custom merch partner brings real design expertise to the table. They know the difference between a good idea and a great execution. They understand Pantone color matching, proper logo placement, and how different printing methods will affect the final look. They'll review proofs with you before production and catch potential issues before they become expensive mistakes.
But here's the another thing that separates good partners from great ones: cultural understanding.
If you're in the music world, especially the jam band, festival, and lot culture scene, you need a partner who speaks your language. Someone who knows the aesthetic, respects the traditions, and understands why a certain font or color palette just feels right for your audience. This isn't something you can fake. Either your merch partner lives and breathes this culture, or they don't.

When your partner genuinely understands the art of music-inspired merch, the collaboration becomes effortless. You're not explaining every little detail or fighting for a vision they don't see. You're building something together. That's the kind of synergy that shows up in the final product and your fans will notice.
Reliability and Timely Delivery: Because Deadlines Are Real
We get it. Things happen. But when you've got a tour kicking off, a new restaurant opening, or a release date you've been promoting for months, you need a swag partner who delivers. On time. Every time.
Reliability means more than just hitting deadlines. It means clear communication throughout the process. It means realistic timelines upfront, not promises that fall apart when production actually starts. It means having systems in place to handle rush orders when necessary, without sacrificing quality.
The best partners will advise you to start conversations 4–6 weeks before you need your gear. This gives you the widest product selection, avoids rush fees, and allows time for design revisions and proofing. But they'll also have your back when plans change and you need something faster.
Ask potential partners about their production timelines, their communication process, and what happens if something goes wrong. The answers will tell you a lot about whether they're the kind of partner you can count on when it matters most.
More Than a Printer: The Collaborator Mindset
This might be the most important point of all. A great custom merch partner isn't just a vendor but they're a collaborator in building your brand's image.
Think about it. Your merch is often the first physical touchpoint someone has with your band or brand. It's what they wear around town, what they post on social media, what they keep in their closet for years. That's a powerful opportunity, and you want a partner who treats it that way.
A true collaborator brings ideas to the table. They might suggest a different garment style that fits your aesthetic better. They might recommend a printing technique you hadn't considered such as like patches versus embroidery on hats or the pros and cons of direct-to-film versus screen printing. They'll push back (respectfully) when they think something won't work and offer alternatives that serve your vision better.
This collaborative approach extends beyond individual orders too. The right partner grows with you. They understand your evolving needs as your audience expands, help you explore new product categories, and become a trusted resource you can rely on year after year.
Finding Your People
At the end of the day, custom merch is personal. It's an extension of your art, your message, and your community. You deserve a partner who treats it with the same care and passion you bring to everything else you create.
The best partnerships feel less like transactions and more like teamwork. When you find a merch partner who shares your values, understands your culture, and consistently delivers quality work, hold onto them. That relationship becomes a competitive advantage as one that shows up in every piece of gear your fans and customers proudly wear.
Ready to start a conversation about your next custom project? We'd love to hear what you're working on. Head over to Drifter Merch and let's create something that crushes.
20 Common Misconceptions in the Screen Printing Industry
As a consumer, it’s easy to assume that all screen printing processes are the same, but there are many misconceptions that can affect the quality and outcome of your custom products. Understanding the truth behind these myths can help you make informed choices for your next screen printing order.

All ink types are the same – Different inks, such as plastisol and water-based, have distinct properties and applications.
Screen printing is outdated – Despite advances in digital printing, screen printing remains popular for vibrant, durable designs.
Any design can be printed – Intricate designs with fine details or gradients can be difficult to reproduce accurately.
Screen printing is always cheap – Quality materials and complex designs can increase costs.
You can print on any fabric – Some fabrics, like nylon or polyester, require special inks or processes.
All prints look the same – Ink type, technique, and fabric affect the look and feel of the final print.
You can print unlimited colors – More colors mean more screens, increasing the complexity and cost.
Screen printing is easy – It requires expertise, precision, and attention to detail for high-quality results.
Screens last forever – Screens wear out over time and need to be replaced after repeated use.
Heat press and screen printing are the same – They are different methods with distinct outcomes and uses.
Screen printing doesn’t last long – Properly applied prints can be very durable with the right care.
Any printer can handle bulk orders – Not all shops have the equipment or capacity for large-volume jobs.
No setup time is needed – Setting up screens and aligning designs can be time-consuming, especially for multi-color prints.
Screen printing is always eco-friendly – While some eco-friendly options exist, traditional methods may involve harmful chemicals.
All printers offer the same quality – Quality varies depending on the printer’s experience, equipment, and materials used.
You can change a design mid-run – Once the screens are set, altering the design is difficult and costly.
Light inks work well on dark shirts – Often, light-colored ink on dark fabric requires a base layer for opacity.
Digital printing will replace screen printing – Both methods have their advantages, with screen printing excelling in large runs.
More ink means better quality – Too much ink can create stiff, uncomfortable prints, especially on garments.
Expensive equipment guarantees better results – High-quality prints depend on the skill of the printer, not just the equipment.
By knowing the facts, you can ensure you get the best quality, durability, and value from your screen printing projects. Don’t let common misconceptions steer you wrong. Make informed decisions and enjoy top-notch results!
How to Resize Images for Print
When you are looking to print a graphic — perhaps as a sticker or custom t-shirt — one of the first things to do will be to resize it to the proper dimensions. But you'll also need to make sure it retains good resolution. Without proper resolution, it's just not possible to get a quality-looking product.
Resizing a large image into a small one is a fairly simple process that most image editors will cover, including Photoshop and many different online-based image apps. But what to do if you're stuck with a low-quality file that you want to enhance? If you can't find a higher-resolution version of it, one way out would be to upscale it. Below, we'll look at how you can do a basic resizing in the first case, and how, if your file is undersized or low quality, Upscale by Sticker Mule helps you get it ready for printing.
Understanding image resolution for printing
Here perhaps we should recap just what image resolution is. In a few words, it represents how much detail your image has, and hence how much it can be expanded. For digital files, that is usually represented in pixels (short for "picture elements"). The higher your picture's PPI (pixel per inch) ratio, the more you'll be able to expand it.
For printing, a different measurement is commonly used: DPI, or dots per inch. It’s the number of dots and spaces a printer produces within each inch of printed material. Higher DPIs mean a higher quality look on your printouts. Typical print sizes are 300 DPI for content such as leaflets, stickers, and labels, and 150 DPI for larger printouts such as posters and wall graphics, where the viewer will stand farther away from the print.

Resizing images with Photoshop
If all you need to do is resize your picture because it's too large to fit your editing canvas or the file is too heavy to upload, you'll find it an easy enough procedure:
Open your image file on Photoshop
Click Image > Image size. A dialog box will open.
Adjust the image's dimensions in pixels on the width and height fields, or simply enter a percentage of the current size.
If you prefer to use a measurement other than pixels, you can also do so in the same dialog box — inches, centimeters or millimeters, among other options.
What if you want to resize your picture while retaining the original one, with the original resolution? That's easy, too — just use the export function:
With your file open on Photoshop, click File > Export.
Adjust your new file's dimensions (pixels or percentages).
Select the format for the new image you are creating (JPEG, PNG, etc.) and click OK.
And that's it — now you'll have created a second, smaller file for your current use case, while at the same time keeping the original one safe and sound.
Using free tools to resize your images
If you don't have a Photoshop account or your laptop starts sounding like a malfunctioning rocket when you try to run it, you can try using one of a myriad of free online tools. Here are a couple of them.
Image Resizer
Image Resizer is a nifty and easy to use tool. Just open their homepage, upload the image you want to resize and enter the new dimensions. Once again, you can do it either in percentage terms or by entering the new size directly in pixels. Just make sure you keep the original width/height ratio intact.
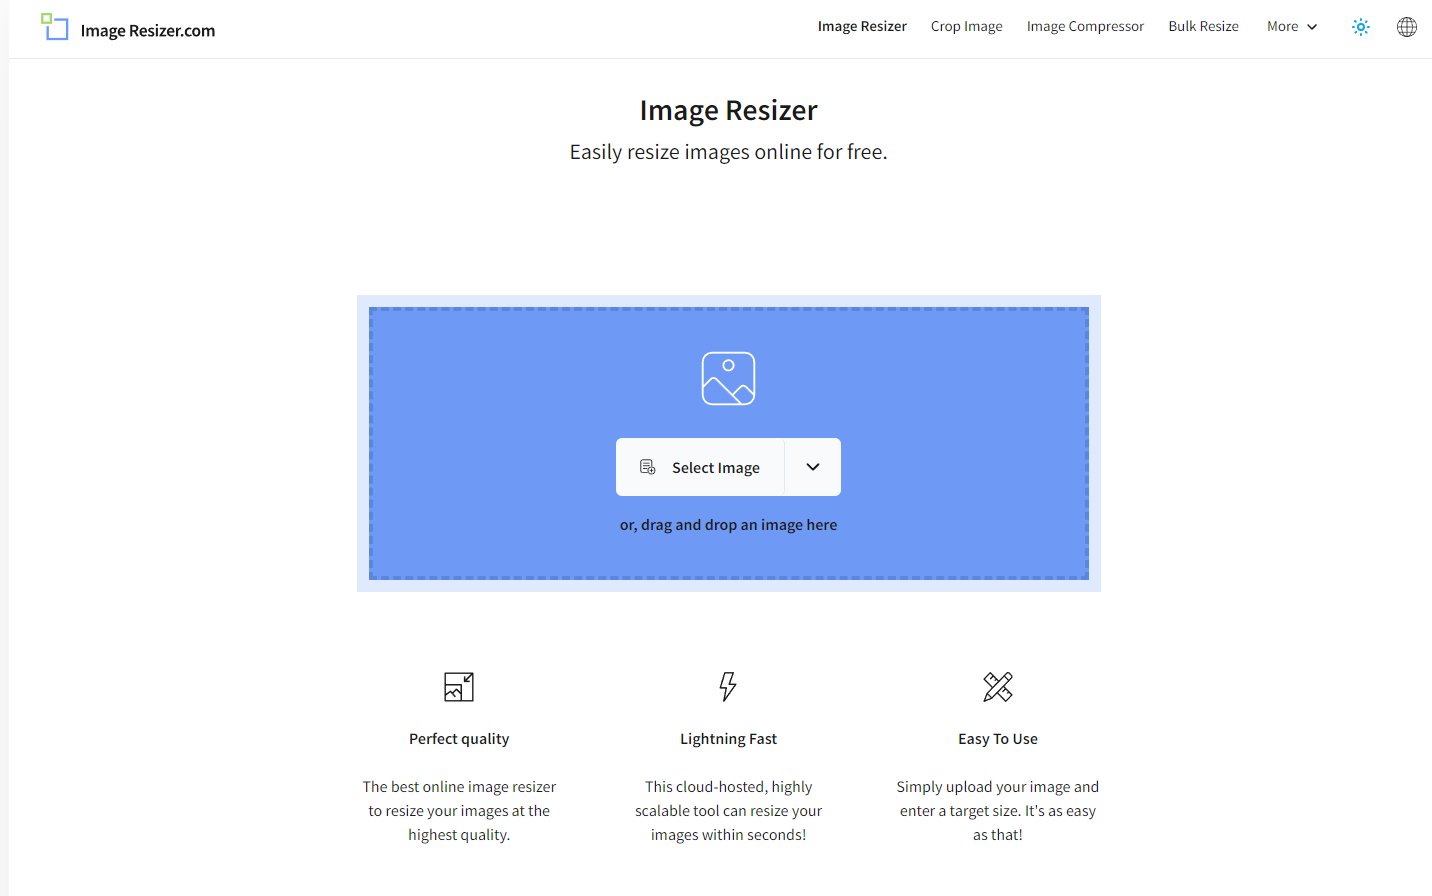
Once that is done, click Resize image and, after a few seconds, you'll be presented with a ready-to-download, resized version of your file. You'll also be able to re-edit it, convert it to PDF, or compress it to a .ZIP file.
Adobe Resizer
You don't need to have Photoshop to benefit from an Adobe resizing service. That's just what their online resizing service is for. To use the free Adobe image resizer:
Go to the Adobe Free Image Resizer page.
Click Upload your photo.
Select the file in question on your computer.
Once the file is uploaded, enter its new dimensions and click Resize.
Your file will soon be ready for download. Before downloading, you'll also be able to choose new dimensions for your file according to standard sizes such as Instagram story, landscape, portrait, and square.
As resizing is a fairly simple operation, any of the above options should be enough for your needs. Both Image Resizer and the Adobe solution are free and don't require creating an account. However, we found that the Image Resizer is best for slower-working devices.
Finally, remember the solution to your resizing needs may be literally in the palm of your hands. Most modern Android and iOS smartphones come with image editing software that works great for simpler operations such as resizing, so you can likely generate your new image file on the go.
Enhancing image size without losing quality with Upscale by Sticker Mule
What if you need to resize an image upwards — that is, your file is too small for your printing needs? Run it through any of the above options, and you'll find yourself looking at a larger, but pixelated and low-resolution image. In fact, the Adobe tool will sometimes tell you straight off that your image is too small for the selected size.
So yes, for enhancing your image size you'll need something a little more advanced than any old picture resizer. Allow us to present our very own solution: Upscale, by Sticker Mule.
What does Upscale do?
Upscale leverages the power of AI algorithms to increase the number of pixels in your image. As it expands your image, it also fills in the missing pixels, avoiding the granulated look you would get otherwise.
Upscale is completely free to use. It also boasts a pretty simple and intuitive interface. Try it out yourself:
Go to the Upscale main page
Upload your image (or images, as you can also run a bulk upscaling)
Select the type of image — photo or artwork —, or, if unsure which to choose, leave it in Auto
Select the desired upscaling scale — 2x, 4x or even 8x.
Click Start processing and hold on tight. Upscaling one or two images should be fast enough, but if you're doing that with a whole bunch of them, you might want to check the Email me when complete box and go about your business. Just don't close your browser tab!
When your files are ready, you'll be shown their new size in pixels, in comparison to the original one. Now click the download button and you're all set.
[Optional]. If you want to order your prints directly from our website, simply select the desired product, below your upscaling results — stickers, coasters, labels, keychains, or anything else from our store. Enter the quantity and size and order in one click. It's as simple as that!

As a caveat, remember even the best apps have their limitations, and Upscale is no exception. If the original file is minuscule and barely has a fistful of pixels to show, you should adjust your expectations for the result accordingly.
Resizing and re-dimensioning are key steps if you want to ensure the best possible results for your custom printed products. And happily, as you can see from the above examples, it's also a pretty straightforward process. So give the above browser-based options a go and see what works best for your use case. You'll soon have a properly sized version of your graphic, ready to print.
**Reprinted with permission for Sticker Mule
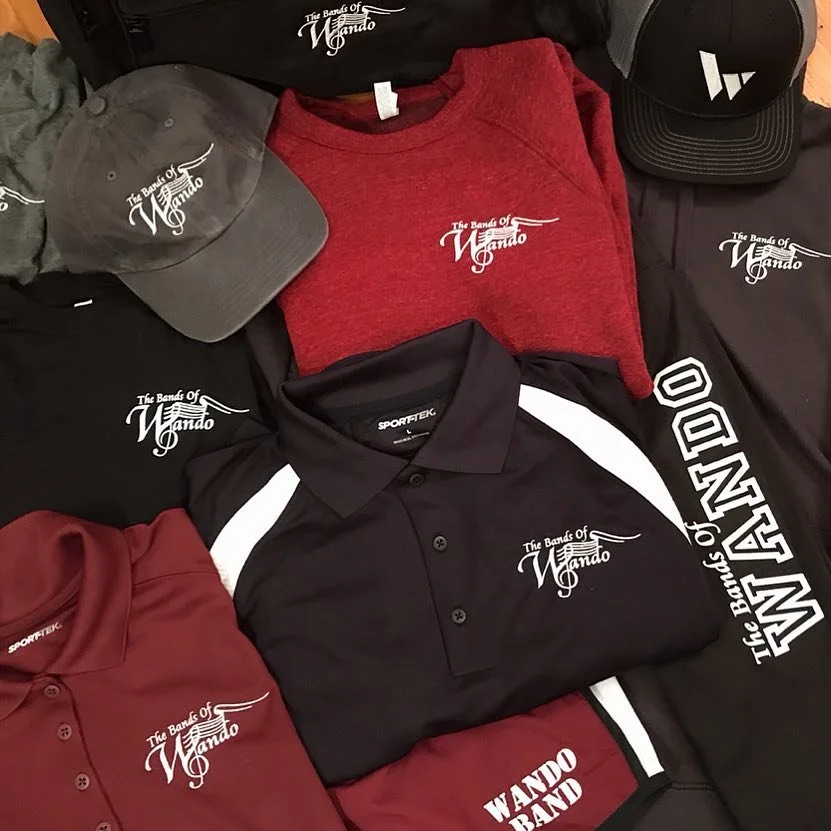
The Power of Custom Screen Printing and Embroidery Services for Your Business

In the world of business, standing out and making a lasting impression is key to success. One effective way to achieve this is through custom screen printing and embroidery services. These techniques offer businesses a unique opportunity to enhance their brand identity, foster team unity, and create memorable promotional items. Here’s why investing in custom screen printing and embroidery is a smart move for any business.
1. Strengthening Brand Identity
Custom screen printing and embroidery are powerful tools for reinforcing your brand identity. Whether it’s on uniforms, promotional merchandise, or office decor, branded apparel and accessories create a cohesive and professional image. Consistent branding across various touchpoints helps customers recognize and remember your business. High-quality screen printing and embroidery ensure that your logo and message are displayed clearly and attractively, reinforcing your brand’s presence.
2. Enhancing Employee Morale and Team Spirit
Uniforms and team apparel are more than just clothing as they also foster a sense of unity and belonging among employees. Custom screen-printed or embroidered uniforms can boost team spirit and create a professional appearance that employees take pride in. When your team wears branded apparel, they not only look unified but also feel connected to your company’s mission and values. This boost in morale can lead to increased productivity and a more positive work environment.
3. Creating Memorable Promotional Items
Promotional products are a tried-and-true marketing strategy, and custom screen printing and embroidery can take them to the next level. From t-shirts and hats to tote bags and towels, personalized items serve as constant reminders of your business. High-quality, well-designed products are more likely to be used and appreciated, ensuring that your brand stays top-of-mind with potential and current customers.
4. Offering a Personal Touch
Custom screen printing and embroidery allow you to add a personal touch to your products. This is especially valuable in customer-facing situations, where personalized items can create a stronger connection with your audience. Whether it’s customizing gifts for clients or creating unique merchandise for fans, personalized items can make a significant impact. This attention to detail demonstrates your commitment to quality and customer satisfaction.
5. Cost-Effective Marketing
Compared to other marketing strategies, custom screen printing and embroidery offer a cost-effective way to promote your brand. Once you have a design and setup, producing large quantities of items can be relatively inexpensive. This makes it an excellent choice for businesses with a tight budget looking to maximize their marketing efforts. Additionally, the longevity of well-made screen-printed and embroidered items means your brand message has a long-lasting impact.
6. Versatility and Customization
One of the major advantages of screen printing and embroidery is their versatility. Both techniques can be applied to a wide range of materials and products, allowing you to customize everything from apparel to accessories. Screen printing is ideal for vibrant, multi-color designs on larger surfaces, while embroidery adds a touch of elegance and texture to smaller, detailed designs. This versatility ensures that you can create a variety of products that meet your specific needs.
7. Standing Out at Events and Trade Shows
Custom screen printing and embroidery are perfect for making a splash at events and trade shows. Branded apparel and accessories help your team stand out in a crowd, making it easier for potential customers to identify and engage with your business. Eye-catching designs and high-quality items can attract attention and spark conversations, leading to increased brand visibility and new business opportunities.

Custom screen printing and embroidery services offer a wealth of benefits for businesses looking to enhance their brand identity, boost team spirit, and create impactful promotional items. By investing in these services, you can ensure that your brand stands out, makes a lasting impression, and remains top-of-mind with customers. Whether you’re outfitting your team or creating memorable promotional products, custom screen printing and embroidery provide a versatile and cost-effective solution that can help drive your business forward. Embrace the power of custom printing and embroidery to elevate your brand and connect with your audience in a meaningful way.
Understanding Minimums in Screen Printing: What You Need to Know
Screen printing is a popular and versatile method of printing used for a wide range of applications, from custom t-shirts to promotional products. If you're considering screen printing for your project, you may have come across the term "minimums." In this blog post, we'll delve into the concept of minimums in screen printing and explain what you need to know to navigate this aspect of the printing process.
Understanding Minimums:
In the context of screen printing, minimums refer to the minimum quantity of items that a printer requires for a specific design or order. Printers often impose minimums to ensure that the production process is efficient and cost-effective. These minimums can vary depending on factors such as the complexity of the design, the type of item being printed, and the capabilities of the printing facility.
There are several reasons why screen printing minimums exist:
1. Set-Up Costs: The screen printing process involves creating custom screens for each color in the design, preparing the printing equipment, and aligning the screens accurately. These set-up tasks require time, effort, and materials. By setting minimums, printers can distribute these costs over a larger quantity of items, making the process economically viable.
2. Efficiency: Screen printing is a sequential process, where each color in the design is applied separately. To optimize production time and resources, it is often more efficient to print multiple items at once. Minimums help printers maintain a workflow that maximizes efficiency and reduces downtime.
3. Profitability: Printing businesses need to cover their costs and make a profit to stay sustainable. By setting minimums, printers can ensure that each order meets a certain threshold of profitability necessary to run their operations successfully.
Here are a few tips to help you navigate minimums in screen printing:
1. Communication: When considering screen printing for your project, it's essential to research potential printing companies and their minimum requirements. Reach out to the printers directly and discuss your specific needs. Clear communication will help you understand the minimums they have in place and explore any potential flexibility based on your requirements.
2. Cost Considerations: Minimums are often tied to the cost per item. As the quantity increases, the per-item cost tends to decrease. Evaluate your budget and determine the optimal quantity that strikes a balance between affordability and meeting the printer's minimums.
3. Group Orders: If you don't require a large number of items yourself, consider joining forces with friends, colleagues, or community groups who may have similar printing needs. By combining orders, you can collectively reach the printer's minimums and share the cost, making it more feasible for everyone involved.
Minimums in screen printing serve a practical purpose, helping printers streamline their production process and maintain profitability. By understanding the reasons behind minimums and effectively communicating with printing companies, you can navigate this aspect of screen printing and find the right balance between quantity, cost, and quality for your specific project. If you are interested in screen printing, please reach out as we offer custom orders.


Learning More about Vector Images
As we do custom printing orders often, we are always sent various formats of logos. Many times they are in the incorrect format needed for screen printing. Our friends at Sticker Mule have allowed us to reprint their blog covering all that relates to vector images. Hope this helps in your printing journey.
What is a vector image?
To better understand what a vector file is, it is important to learn the two basic categories of a digital image: raster graphics and vector graphics.
You may already be familiar with a flat or raster graphic. These graphics are .jpg (Joint Photographic Experts Group), or .png (Portable Network Graphics) file types. Notice that when you zoom in a .jpg or .png image, you’ll see that the image becomes blurry and you start seeing little square dots. These dots are called pixels. This is the basic foundation of a raster graphic: flat little dots that form the full picture.
On the other hand, a vector graphic is made up of mathematical formulas rather than flat, fixed, and solid colored pixels. The formulas create the points, paths, lines, curves, shapes, and colors that you see in a vector image.
The most important attribute of a vector image is that it is infinitely scalable without compromising the quality of the image. No matter how close you zoom in, or how big you scale a vector image, it will remain smooth. The resolution will also remain high! Some common file formats of vector files are .ai (Adobe Illustrator), .eps (Encapsulated PostScript), and .svg (Scalable Vector Graphic).
Where are vector images used?
Vector images are used in branding and printing. Most logos, icons, and other graphics that you see displayed on websites online are vector images. Most print jobs you have seen might also have been vector images before printing.
What can you do with vector images?
Because vector files are resolution independent, they are great for large scale printing like banners, signs, and other large format jobs. Vector files are also great for smaller prints like business cards, packaging, and stickers because even the tiniest details are guaranteed to be sharp and clear.
It is generally a good idea to keep graphic assets as vector files because of its smaller file size compared to a raster image. You can also update and edit vector files with ease as well as export it into any other file type you need anytime.
What are tools that can convert an image to a vector?
There is a variety of software, both offline and online, that have the ability to export vectors. Some popular professional software are Adobe Illustrator and CorelDRAW. There are also open source and free software like Inkscape and Vectr.
Alternatively, there are a lot of free vector conversion websites where you can upload your image and convert them to a vector image. The downside of using free and automatic conversion tools like them is that you will not get an accurate image. Some include watermarks, while some simply do not produce high resolution vectors.
Here’s our pro tip: Redraw from Sticker Mule converts and upgrades any image to a high resolution, vector graphic. Redraw eliminates the hassle of tracing, coloring, finetuning, and exporting. Though you may need to shell out a few bucks, Redraw guarantees that it will convert any image into a high-quality vector image that is infinitely scalable! And after that, your new poster, sticker or image for screen print will be ready in no time!

How do you convert images to vector for free?
There are a lot of websites that convert flat images to vectors for free. Some of them go as far as giving the user the ability to input the number of color output, as well as designating a color palette. One of the best examples is pngtosvg.com.
The downside to this is that aside from the webpage being heavy because of numerous ads that pop up all over the site, the output creates imperfect and crooked lines. (And be careful with clicking on those ads too! Sometimes, they may lead you to malicious, virus-ridden websites! Yikes!)
The converted vector also creates unnecessary extra shapes. You would still need to download and edit the vector image using software to finetune and clean up the vector.
Converting images to vector: Tips from a designer
Here are some tips on converting a flat image into a vector:
Converting images into vectors works well for images that are simple, clear, and have minimal colors.
When manually tracing, zoom in as close as possible so that you are able to follow the lines with better accuracy.
Use the color picker tool when filling in paths and shapes.
If the software that you are using has advanced automatic tracing tools, take advantage of it! You will only spend time fine tuning the result
If you’re not a pro designer, then doing this process manually may not yield the best results. It’s better to take advantage of online tools like Sticker Mule’s Redraw to get that perfect finish!
These are all great tips from Sticker Mule. Be sure and check out their custom stickers for all of your projects!